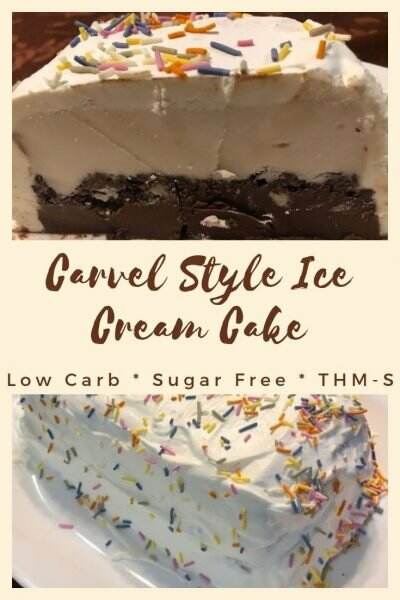
Carvel Style Sugar Free Ice Cream Cake
Sugar Free Carvel Ice Cream Cake
Repin this post for later!
Have you ever had a Carvel ice cream cake? I’ve always loved them, and they’ve traditionally been my favorite birthday treat, but they are so full of sugar. Which I’m trying to cut back on drastically. I actually have a copycat Carvel Ice Cream Cake recipe. It’s a few years old, from back before I was following Trim Healthy Mama, so it is certainly not sugar free.
So I decided to THM-ify the Carvel ice cream cake. This one is low carb, sugar free and an S on Trim Healthy Mama. It is kind of a heavy S with all the cream and almond flour, so this is a delicious special occasion type treat.
*Affiliate links are included in this post. Please see full disclosure policy here.
I recently bought an ice cream maker and I bought an extra bowl and paddle, so I was able to do this cake all in one day. If you only have one freezer bowl, you will have to make your batch of vanilla, then wash and re-freeze the bowl and do the chocolate layer the next day.
If you don’t have an ice cream maker or want to get this done more quickly, you can purchase an on-plan store bought ice cream. You will need at least a pint each of chocolate and vanilla. This may be an easier option, but will also be more expensive.
I would choose Rebel brand ice cream over Halo Top, because Halo Top has added sugar. You may also need to use a smaller container if you do this, or your layers may be too thin. A 5 cup container like this one would probably be ideal.
I based the ice cream layers on the chocolate ice cream in the latest THM ezine. It was not as sweet and rich as the recipe I typically use, but the sweetness of the whipped cream icing and chocolate crunch help to balance that out. If you will be making homemade ice cream, a bread pan will do.
First of all, make the chocolate crunch layer.
Chocolate Crunch
2 TBSP refined coconut oil
1/4 tsp blackstrap molasses
1/2 Cup almond flour
1/3 cup gentle sweet (I make my own blend)
pinch mineral salt
2 TBSP cup unsweetened cocoa powder
Melt the coconut oil and stir in the molasses. Then add the almond flour, gentle sweet, salt and cocoa powder. Stir and fluff with a fork. It should create a crumb-like texture. Set aside.
If making ice cream, make the vanilla layer first. If using store bought, allow the vanilla ice cream to soften at room temperature. You don’t want it to completely melt. Just to get soft enough to spread in a container.
Vanilla Ice Cream Layer
1/2 cup cottage cheese
1/4 cup heavy cream
1/4 cup THM Gentle Sweet
1 & 1/4 cups unsweetened cashew or almond milk
6 TBSP unflavored Whey Protein
1 tsp vanilla extract
1/16 tsp Salt
1/2 teaspoon Gluccie
Blend the ingredients in a blender, saving the gluccie for last. Pour mixture into your ice cream maker and churn about 20 minutes. Pour into your container (a bread pan will do) and spread evenly.
Sprinkle the chocolate crunch evenly on top of the vanilla layer. You don’t have to use it all. I had some left over. Put in the freezer while you prep the chocolate layer.

Chocolate Ice Cream Layer
1/2 cup cottage cheese
1/4 cup heavy cream
1/4 cup THM Gentle Sweet (I make my own blend)
1 & 1/4 cups unsweetened cashew or almond milk
2 TBSP unflavored Whey Protein
3 TBSP cocoa powder
1 tsp vanilla extract
1/16 tsp Salt
1/2 teaspoon Gluccie
Blend the ingredients in a blender, saving the gluccie for last. Pour mixture into your ice cream maker and churn about 20 minutes. Pour over the chocolate crunch layer and spread evenly. If using store bought, allow the chocolate ice cream to soften at room temperature and spread over chocolate crunch.
Put it into the freezer for at least 2-3 hours, until the ice cream has solidified. Then, remove the container and use a knife to scrape along the edge of the ice cream in the pan to help loosen it from the sides. Turn the container upside down over a plate and keep it there until it unsticks from the bottom of the pan. Again, you don’t want to leave it unattended so it melts. You want it to stay as frozen as possible.
When the cake has loosened and fallen onto the plate, remove the pan, make sure the layers are still aligned and return to the freezer at least an hour. In the meantime, make the whipped frosting.
I used powdered Swerve because I felt like I really wanted the bulk of the Swerve, since it is less sweet than Gentle Sweet. But you could try it with gentle sweet if you don’t want to buy Swerve. You only need to use half as much.
Double the recipe if you want extra to pipe onto the cake.
Whipped Cream Frosting
1 cup whipping cream
1/2 cup powdered Swerve
1/2 tsp vanilla
1/4 tsp gluccie
Mix the ingredients in a mixer at high speed, 2-3 minutes, until stiff peaks form. Do not overbeat or you will end up with really sweet butter!
Remove the cake from the freezer and ice the “cake” as quickly as possible. I found these sugar free sprinkles to use on the cake. You can also make your own, but I found this so much easier and more convenient and didn’t use nearly all the sprinkles in the bottle. And I feel they’re rather reasonably priced for a sugar free product.
Return to the freezer after decorating until ready to serve. Cut into sliced and slice those in half. Makes about 16-20 servings.
Thank You for what seems to be a simple sugar free Carvel ice cream cake recipe. I can not wait to make this Treat. I have found that there is a shortage of sugar free products out there and if you do find something it’s so expensive, so I will let you know how it all turns out. Wish me Luck.